Tuesday, November 4, 2014

The Learning Commons is OPEN!

So many staff members at our school have worked really hard to transform our library and school into the Learning Commons and now it is open.  Our kids are getting the benefit of everyone's hard work.  We go to the LC every Wednesday afternoon--not often enough according to the kids! I know they would be happy to go all day, everyday!  I recommend stopping by if you get a chance.  It truly is amazing.

We started with a tour and exploration of the lego table.  My kids told be that on our next visit they HAVE to do the robot station...so we did.  Here's a picture of them working together, using step by step directions from a computer program, and building an alligator lego robot.

One of the features of the LC is the Lego wall.  And by Lego wall I mean that it is a whole wall to hold and build Lego creations.  I was inspired by this idea and decided to create one in our classroom.  Here is our new interactive Lego artwork.


Roller Coaster Craziness!


I wanted to update everyone on what we have been doing in IC.  We just finished our unit on structures and forces.  Our kids learned about the different types of forces...push and pull.  We also talked about tension and compression in structures.  We used these ideas to build roller coasters.  The kids worked in groups of 3-4 and could only use cardboard and tape to make a roller coaster for a marble.  They did an amazing job and worked had as teams for a week.
Here's a few pictures of the construction process...


Here are they awesome creations!


So, what do you do when you have 3 amazing roller coasters and your kids still want more?

You make 1 giant roller coaster from them!


Thursday, October 2, 2014

Engineering Exploration

My crew just started a new unit on structures. We will explore different types of structures over the next few weeks and use all kinds of different materials. We will discuss and use vocabulary like stability, strength, tension, and compression.

We started by exploring with straws and connectors and had the task of creating the tallest structure possible. They did a great job exploring and figured out how to construct a sturdy base. By the end they were adding all of their designs together to build a structure taller than Mr. Rodriquez.


Our first big design challenge is to figure out how to make our own pop up card. Here's their problem: they need to design and create and card that has a part that pops up and a part that is movable. Here are a few pictures of our first designs...


Stay turned for pictures of our redesigns.

Please send toilet paper/paper towel rolls and cardboard containers (like cereal boxes) for a future design project.  Thanks!

Thursday, September 18, 2014

Visual Aids at Work

Here are my pet peeves about visuals...they need to be used consistently,  they are not just for behavior, and they need to be constantly evolving to their independent level.  My kids use a visual schedule system that is adapted to their individual needs.  I currently have a kid that uses an object schedule, one that uses a wall schedule and 5 kids on binder schedules with icons. Visual schedules need to evolve over time. They can eventually turn into a paper check system or just a printed schedule of their day. Just make sure that you have taught how to use it and that the level you are using is a match to their independent level. Side note: a great way to track their independent level is by taking data on this functional skill...I love taking data!

Visuals make work easy and can be the best tool in your tool belt. Visual aids are any system you use that aid in communication and/or information processing.

My kids rotate "stations" every 15 minutes. When the timer beeps we give them a 'check schedule' card and they move to their binder schedules. They open their binders and grab the next icon. Then, they take the icon to the matching table and 'check in'.  Whatever  schedule system you use just make sure it moves either top to bottom or left to right. I use 2 different types of color coding systems.  The one that is really just to keep me organized is that I color code all of my kids personal visuals (schedule pages, social stories, personal icons, communication book, penny boards, etc).  My student with the wall schedule is purple and all of his visuals are outlined in purple or printed on purple paper.  It makes reloading schedules quick and easy at the end of the day.  I also color code my tables.  This is the system that my kids use.  Each table is a different color and they match the icon to the sticker.  Also, for quick reloading, I write the color or letter (B for blue) in each square on their schedule. 
Wall schedule that is currently empty but you can see the icons on the other strips hanging from the bookshelf
One of my binder schedules with icons that moves top to bottom.

The sticker on the table with where they "check in."  We also keep a basket on every table to store the icons throughout the day.


I also have these hanging in our DT area.  They are outlined in the kids "color" and just a reminder for the teacher working at the table.  It's a nice visual reminder/tool for us to stay organized when you have a lot of kids with a lot of goals and a lot of data to keep.  I also like that it doesn't have their name plastered on the top of it.  No one coming in my room knows who the paper belongs to and you can easily flip over the page to the next kid that rotates into that station.  I use the same system in PRT and other areas.


After the kids have 'checked in' they will then need visuals to help them work through the activities. When my students are at their desks they have 2 icons that tell them what bucket stations they need to complete. I also have procedure cards posted around the room for other stations or activities These help with independence and help clarify expectations. They also carry their penny boards for reinforcement and a visual reminder of expectations.


Procedure cards and step by step visuals are huge for ASD kids.  These will help to give a clear start and end to a task. Some students can pick up on these quickly and others it takes a ton of time to practice. For students that struggle with procedures try backwards chaining. Backwards chaining is where you work backwards. If you're working on washing hands , you physically do everything for them except the last possible step (eg: throw the paper towel away). Once that is independent add a step (eg: they dry hands and then throw it away). Continue to add a step until you are at the start if the task. It sounds funny to have them work backwards but it actually gives a clearer picture of when a task starts and stops.

Color coded procedure cards :)
Don't reinvent the wheel.  I found these on TPT from The Autism Helper.  They are perfect because they can be EDITED to meet your kids needs!

Be consistent.  These are posted in every bathroom my kids use.

Behavior visuals also need to be at the ready and tailored to each student. Building a social story library can be a time saver but make sure the specifics are directed to each students' needs. For example, using 'nice hands' means 3 different things in my class (not hitting, not pinching, and not scratching). I keep the story basically the same and just change the wording and pictures to match their need or targeted behavior.

I have a student that practices walking with a teacher.  These visuals are hanging by the door for when we leave the classroom.  We have taped stop signs about every 15 feet around the school.  We carry the visual and when we reach a stop sign we stop and count to 5 before walking again. 
Penny board.  I put behavior reminders on the board.  It is just quicker than finding my visuals key chain and flipping through it to find the right card.

Last thought on visuals, if there is an academic need there is a visual that can help, and, if the is a behavior need there is a visual that can help. They are not just for kids with autism! I am a big fan of the less words the better (even though this was a rambling post).  The less words the less confusion, frustration, and less escalation. It's really hard to argue with a piece of laminated paper!

How do you use visuals in your classroom?


Sunday, August 24, 2014

Aaaand We're Off

The first day is in the books. I am so excited to start this year! My awesome team, Mr. Rodriquez and Ms. Tressa and I have worked really hard the past few days!  I think it's time to show off our work.

I had one big goal in mind for my new classroom and that was to create a better environment for my students to be independent.  This is a huge step for them and a big help for us. 

Here are a few pictures from around my classroom...

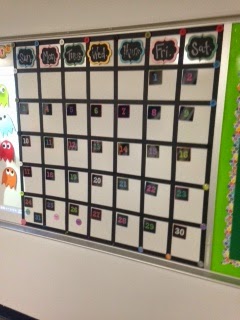
Looking at my whiteboard I have my daily learning objectives on the left.  These get a bit tricky because in a 15 minute rotation my kids could work on 2-3 different skills.  I also have 7 kids on 7 different levels.  To keep them brief, I keep them general. I usually write 2 learning targets for each subject and it is only about what it going on at my teacher table.  I need to add in a science label but I am a bit OCD and I can't make the label until I find the font that I used before...I'm still looking.  On the right of my whiteboard I have a calendar taped up.  I love it!

 
Here are my 2 interactive bulletin boards...super interactive right now :)  I update them with different vocabulary, materials, and skills that we are working on. I have one other board.  You can see it in a few pictures.  It is long and purple and I plan on hanging some anchor charts from it.  I am trying to keep the distractions to a minimum...which is hard for me...I love color and making all kinds of crazy stuff.

 
Here are a few pictures of how I keep my materials organized.  I have all my math materials in the buckets with the labels.  I love having them out so I can easily access them and my kids can grab whatever math tool they need to solve a problem.  I have 5 returning students and they know how to use these.  I was so impressed with one of my boys today.  He sat down to his morning work and saw addition problems and went straight to the number charts bucket and grabbed a hundreds chart.  That skill was not lost over summer!  I separate my LA and Math stations.  LA stations are labeled with letters in my amazing IKEA cabinet and my math stations are in the numbered green buckets (also from IKEA). I spent some time at the end of the year last year to send of books that I made for my kids to use during stations.  This is saving me so much time!  I have 4 LA and 2 math stations that I never have to switch out. It is also helps build that independence in my kids.  They know exactly what to do and can pull it out and finish it with minimal assistance.


You can also see the binder schedules we are using on the bookshelf.  I have one kid that uses an object schedule that is hanging on the cabinet next to these schedules.
 
In the middle of my class I have our independent station.  Each of my students rotate through this twice a day.  This is probably my hardest station to prepare.  I think as a teacher I want to keep my kids moving forward and working on new skills.  It takes a lot of effort for me to step back and assess what my kids can do completely independently and then...the harder step is to let them do it independently.  I have got to work on this because I know this is probably the most important station in my room and it is so vital that my kiddos learn to be independent. I have differentiated tasks in the buckets and most of my kids can work on 3 tasks before moving to the next rotation.  As they complete a task on the left they move it to the red tray on the right (the finished tray).

Here's a craft project clock I made last year.  I grabbed it for like 5 bucks at target and then painted the hands and numbers to match our Judy clocks we use in math.

 
Here's how I arranged my students' desks.  I have some kids that come in and out and others that stay all day.  Either way it is important to me that all my kids have a place that is theirs to work in and a place where they know they are a part of the team. 

 
Here is what we call green station or PRT.  It is for language development and working on social skills.  This is where we get to bring out all the fun toys :)
 
 
My kids second favorite area is yellow table or computer/iPad station. 

Login cards and computer website choices are hanging on the wall.  Also, a direction sheet for what to do when they are assigned to a certain computer or iPad station
This is our tech supply central.  Wireless mice, headphones, and iPad chargers.
This is our blue table (one on one) area.  I have it set up so the teacher has access to all the supplies on their left.  Each of my kids are working on 4-6 different skills at this table at a time...hence all the folders.  It is also prepared with data keeping reminders, prompt reminders, visuals, and MATERIALS.  Nothing is worse than sitting down and realizing you forgot to pull a set of cards and then by the time you grab it and turn back around the kid is gone (either physically gone or the attention is somewhere else)
 
Last picture...This is where my kids drop off their lunch boxes, snacks, communication books and anything else they decided to bring from home. I have 7 kids but currently only 6 crates. Can you guess which color is missing?  It's black...and it should be delivered this week.  I have a small obsession with color coding my kids.  They don't really know that I do this.  It is just a tool that I use to keep myself and ALL of visuals organized.  Back at blue table I have colored folders for each of my kids skills they are working on.  I have the same color on their binder schedule.  And I'll post later about visuals but they are color coded too.  It makes my life so much easier.  I have 7 kids that need a visuals throughout the day.  For example, today we came back from recess/lunch and I only had 5 visuals turned in.  Instead of asking each student I just had to look and see that I was missing a green and a red...I asked those kids and they had them in their pockets.  It saves so much time!

 
I love my class! I love my kids! I am so excited for a new year!